Are you just starting as an online ESL tutor and looking for some online ESL teaching tips? It can be hard to know where to start as an online ESL tutor. But don’t worry — you’re in the right place! In this article, we’ll guide you and help you set your lessons up for success. Let’s explore some tips to boost your online ESL teaching game.
1) Get your tech prepared
Being prepared with your tech is a must. All online teachers need a classroom where everything works smoothly. Let’s see how you can make sure your setup runs without any problems.
- Ensure a reliable internet connection. Having a stable internet connection is very important. Imagine teaching a class and your internet drops at an important part of the lesson. That can really negatively impact your lesson. To avoid this, invest in a reliable internet service provider.

- Quality microphone and webcam. Your voice and image should be clear to your students. A good-quality microphone and a clear webcam are key. Test them before each lesson to ensure they’re working properly.
- Familiarize yourself with the platform. Whether you’re using Zoom, Skype, or another platform, take time to learn its features. You don’t want to run into issues during your class. You should definitely be comfortable with screen sharing, since you’ll likely be using that a lot. This is really useful if you have some worksheets or other materials. Also, on Zoom, you can use something called remote control. You may already be familiar with this. Essentially, this allows students to control your screen. This is especially useful if you have an interactive worksheet and you want to guide the student through the activities. This way you don’t have to send it and instruct the students to “scroll up, scroll down”, etc. Both you and your students will be able to interact with the document.
- Test your equipment. Technical problems disrupt the lesson’s flow. It can be frustrating for both you and your students. Test your equipment, including your microphone, Wi-Fi, webcam, and the platform itself, before each lesson. It’s an effective way to avoid interruptions.
- Use interactive whiteboards & annotation tools. To improve your online ESL teaching experience, try using interactive whiteboards and annotation tools. These tools allow you to engage with your students in real-time. These can really enhance your lesson and make the learning process more interactive. Platforms like BitPaper, Explain Everything, Classroom Screen, and Miro offer excellent options for interactive whiteboards and annotation tools. As you’ll see, you can illustrate concepts, highlight key points, and collaborate easily. Don’t forget about an annotation tool. This will allow you to write or take notes directly on your screen. It’s very useful if you’re using Google presentations for lesson materials. If you use these tools, you can create a more immersive learning environment.
- Find a quiet space. Although this isn’t a tech tip, it’s still worth mentioning. If you’re teaching lessons online, you’re likely at home. Find a space where there’s not a lot of traffic or noise from the outside. That can really disrupt your lesson.
2) Organise your online toolkit
Getting organized is key, just as it is in any other profession. That’s why we’ve put it at the top of our online ESL teaching tips. As a teacher, you need a toolkit. These are your resources that will guide your lesson to success. Let’s explore some tools and strategies:
- Conduct a student level and needs analysis. If you haven’t already, you should learn about your students’ level, motivations, goals, needs, and preferences. Ask them questions or have a simple survey to understand what they want to achieve and how they prefer to learn. This will guide your lesson planning. You can refer to our article on student needs and level analysis for more information.
- Have a material bank & centralized storage. Your material bank is like a digital library. It’s where you gather all the resources you need for your online lessons. You can create this storage space on various cloud-based platforms such as Google Drive, OneDrive, Dropbox, or even dedicated educational platforms like Google Classroom. These platforms offer ample storage space, ensuring you have room for all your materials.
Having a material bank with a diverse range of resources is key. You should try to use a variety of resources. These can include:
- News: Collect articles related to various topics. These can include not only current news, but also culture and language. Browse news, blogs, or educational platforms for engaging topics. You can browse global news, but make sure to browse local online news sources too. For example, if you have a student in a different country, take 5-10 minutes before the lesson to browse some news stories in English in that country. Bring them up with students in class and ask their thoughts. Current events engage students and often drive meaningful conversations.
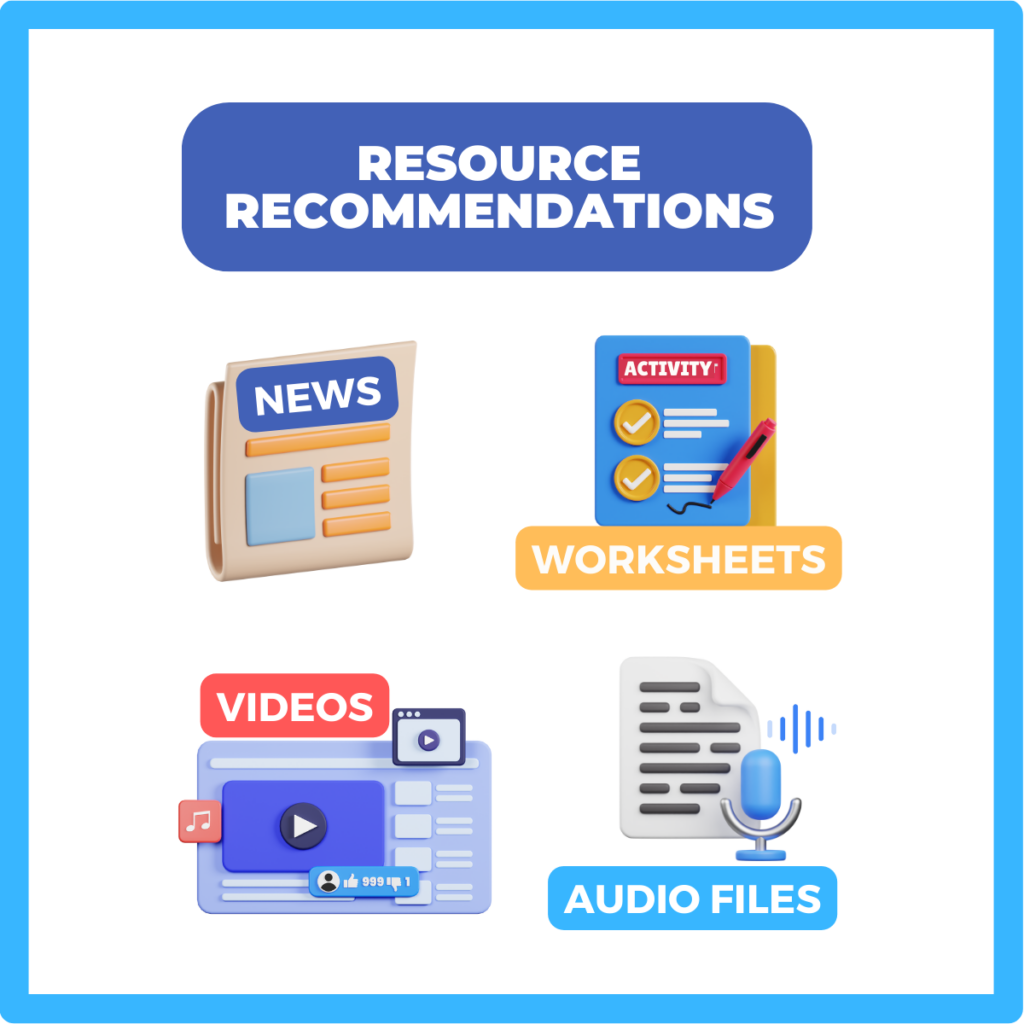
- Worksheets: Include worksheets and exercises designed to practice specific language skills, from grammar and vocabulary to reading and listening comprehension. There are a ton of places you can find worksheets. One place we’d like to recommend is iSL Collective. They’ve got a full database of worksheets created mostly by teachers, and they’re free. In online classes, you should also try to work with interactive and digital materials.
- Videos: Incorporate video lessons, clips, or documentaries that align with your teaching objectives. Video-based content adds an engaging visual dimension to your lessons. Given how useful video content can be as a learning resource, you should become a master at using video in the classroom. With some practice and with the right resources, you can really elevate your online ESL teaching skills.
- Audio files: Gather audio resources such as podcasts, interviews, or audio recordings that enhance listening comprehension and pronunciation practice.
One of our online ESL teaching tips is to combine resources. For example, you could combine worksheets with news articles or videos. Or, you could play an audio file of a news story, and follow it up by having students read the same article. Since you’re teaching online, you really want to make sure you build up your digital toolkit as well as your material bank.
As you build your material bank, you want to want to make sure it’s organized. An organized material bank is a teacher’s best friend. Group your resources logically based on various criteria:
Level: Categorize materials by language proficiency level, such as beginner, intermediate, or advanced. This makes it easy to select content tailored to your students' abilities.

Topic: Arrange materials by topic, whether it's travel, business, health, or any other subject of interest. This allows you to quickly access relevant content for themed lessons.

Skill: Group resources according to the language skills they target, such as reading, writing, speaking, or listening. This streamlines the selection process when planning specific lessons.
- Store your materials in Google Drive folders. These are like personal folders for each student. It’s a place where you can share specific resources tailored to their needs. Each student has their own folder where you organize recordings of their speaking exercises, worksheets for their homework, feedback sheets with your comments, and tests to track their progress. This personalized approach makes online learning feel more like a one-on-one experience.
- Bookmark with Diigo. Diigo is your digital bookmarking platform friend. Use it to save and organize your favorite websites. You can tag websites by topic, making it easy to find them later. This helps you quickly access valuable resources during your lessons.
3) Plan your lessons with structure
Planning your lessons is like making a map for your teaching journey. However, you need to have structure. This will help you and your students know where you’re going. Remember, it’s fine to divert from the lesson plan at times. You can improvise to address your students’ needs. Let’s look at some methods and tools you can use to plan your lesson with structure:
- Set objectives. Start with a clear lesson plan that outlines your objectives and a schedule. This roadmap will keep you on track and ensure your students receive a well-organized lesson.
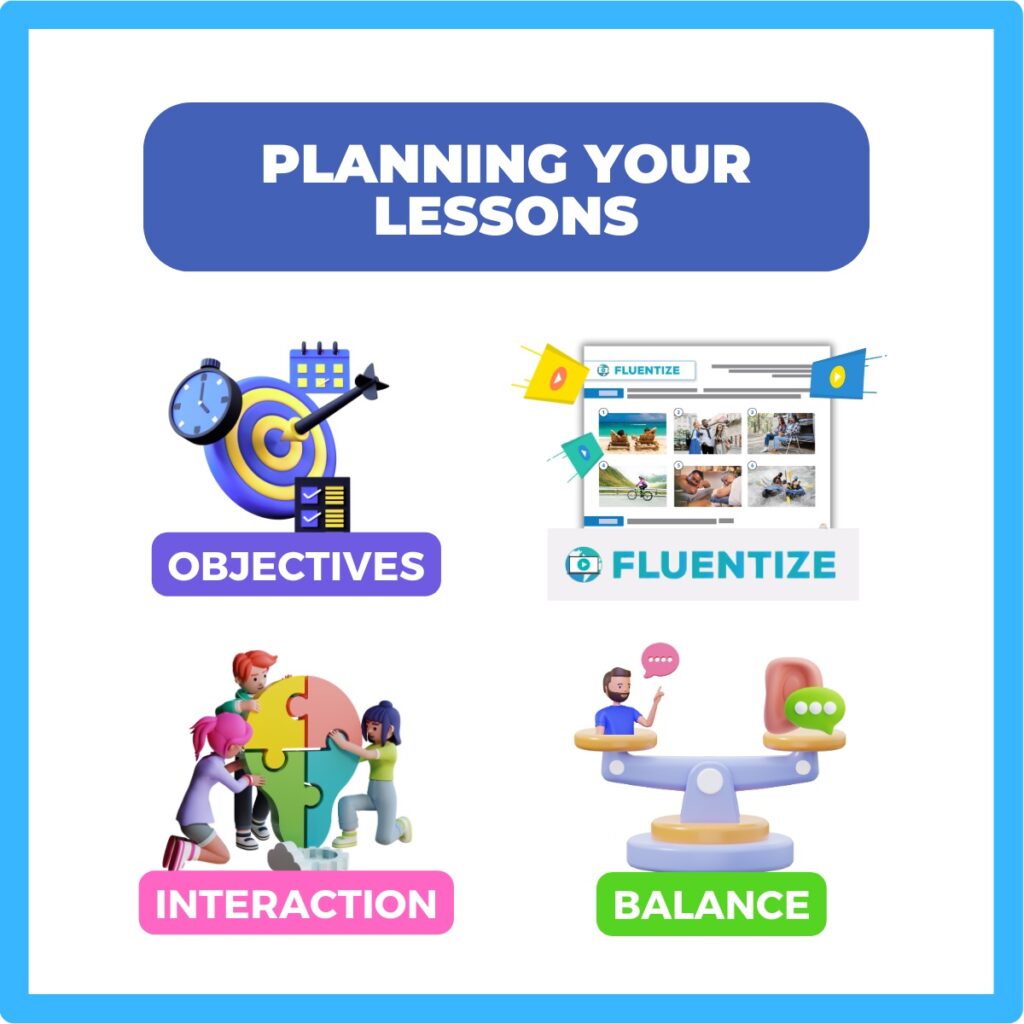
- Explore ready-made lessons. Why not make your teaching life easier? If you’re looking for lesson plans with structure, try out our ready-made video lessons on Fluentize. When you’re short on time or want to jazz up your classes, Fluentize is there for you. You can pick lessons based on different levels, topics, and skills. The best part? Each lesson comes with both student and teacher PDFs, and many offer Google slide lessons to add a fun and interactive element to your classes. You can easily customize these slides to match your teaching style after downloading. Each lesson costs around $3. Some of our favorite lessons include:
- “Hello, I’m Matthew.” — Personal Introduction (A1)
- Self-Care Planning: Work Towards Wellbeing (A2)
- How To Stay Motivated When Learning A Language (B1)
- Digital Nomads: Changing The World Of Work (B2)
- The Rise Of Overtourism Through Instagram (C1)
- Make your lessons balanced. Balance can mean several things. Here, we mean balance between casualness and professionalism. When you plan your lessons, it’s ok to make time for casual small talk. However, you may want to avoid just chatting the whole time without some kind of goal or direction. Students often like having a mix of both approaches. They want to feel comfortable, chat a bit, but also learn using objectives, materials, techniques, and other tools. Balance can also refer to the skills they’re practicing. In one lesson, you could focus on reading a news story, and then the next week, you focus on listening to a news story.
- Make your lessons interactive. Imagine a class where everyone is excited and takes part in the fun of learning. You can make that happen with the right strategies. In your lessons, use interactive activities and games. These are great ways to engage students. You could also consider role plays, interviews, or presentations. These are all activities students can do in an online class. Don’t forget that you can use tools like Google Drive or Dropbox to keep your interactive materials organized and easily accessible.
4) Start and end the lesson strong
Although this tip also applies to lessons in physical classrooms, it’s important to emphasize for online lessons. Starting and finishing your lesson strong can have a big impact. Here are a few tips for starting strong:
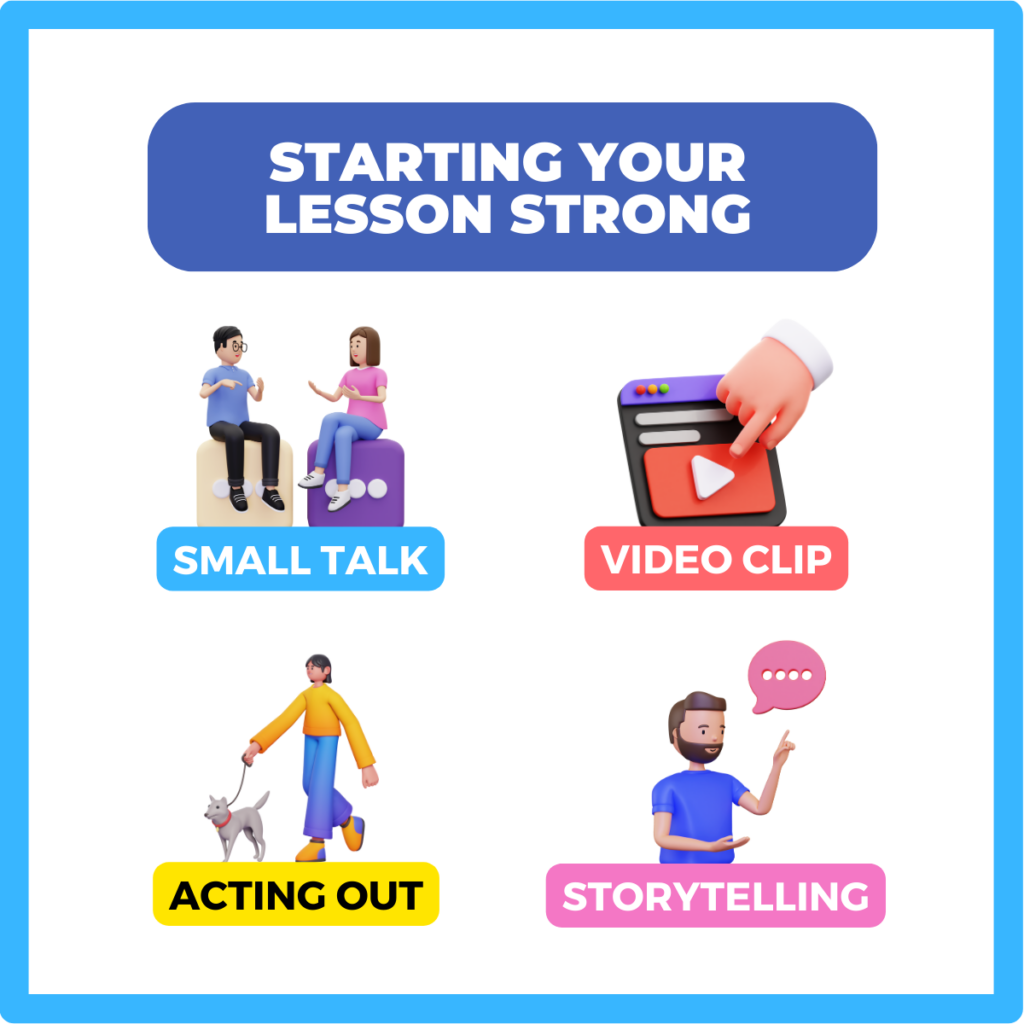
- Start casually. Consider starting a conversation naturally and casually with small talk. Talk about students’ work, weekends, and other life updates, much like you would with a friend. Many students like having casual and friendly chats in English before diving into business. It feels natural. This can set a positive and welcoming atmosphere for your students. However, don’t be afraid to try some other ways to start the lesson strong. You can also use these engaging ways below to elicit a topic.
- Play a short video clip: This is a great technique for introducing a lesson theme. When you do this, try not to choose a video that’s too long. Try to find something short, around 30 – 60 seconds. For example, in the first part of this lesson plan on virtual reality, students watch a lively commercial video of the Apple Vision Pro headset and answer a few questions.
- Act something out: Doing this online can be tough since you have limited physical space, but try to be creative. Don’t be afraid to be vulnerable or look silly. Your students might appreciate this. For example, if you are doing a lesson on the theme of “pets”, you could act like you’re walking a puppy around and giving it some commands. This is a fun way to elicit the word “puppy” or “dog” to begin your lesson.
- Tell a story: Stories are a great way to start a lesson. They engage students and often don’t even require materials. If your lesson is on the topic of “success”, tell them about a time you were successful in something. This is likely to encourage students to open up about a time they were successful. Remember it doesn’t have to be a story about bigger theme. It can simply be a funny story about your weekend.
Some of the approaches above may work better depending on your classes and students. For example, starting the lesson with some small talk might work better if you have a one-to-one lesson with an adult student. Acting something out might be a better option if you have a small class of teenagers.
Now, here are few online ESL teaching tips to end your lesson:
- Make time for reflection. Set aside some at the end to cover the main points of a lesson. You can do this simply by asking them some questions. What did you learn in this lesson about [topic]? What new vocabulary, grammar, etc. did you use? What was difficult about this lesson? You can also talk about what might be useful to focus in your next lesson.
- Error Correction: You can also use this time to review some of the mistakes students made in the lesson. This is called delayed error correction. During the lesson, you should try to write down some speaking mistakes students make. Keep these on your notepad and come back to them at the end. Write the sentences with the mistakes, and have students try to find them. By doing this, you can also find a repeated error that could give you direction for your next lesson. For example, if a student makes a mistake using definite and indefinite articles, that could be a focal point for your next lesson.
5) Manage your time effectively

One of our key online ESL teaching tips is to make good use of your time. As a teacher, if you don’t keep to schedules and calendars, things can get messy. Here are some practical tips to help you manage your time wisely:
- Stick to a schedule: Just like catching a bus, start your lessons and finish them at the times you’ve set. This way, you and your students know what to expect.
- Use a time-tracker: Sometimes during a lesson it can be easy to lose track of time. You may find that you’ve spent a much larger amount of time on one activity than you planned. It can throw the whole lesson off its course. Therefore, try using a timer as a trusted assistant. Use it to keep track of how long you spend on each part of your lesson. You also may realize that setting a timer for each part of your lesson may be inconvenient. In that case, try to keep an eye on the clock and be conscious of the time. This will help you stay on track.
- Take a break: Just like you need to rest on a long hike, schedule short breaks during your lessons. It gives you and your students a chance to catch your breath.
- Use a calendar: Picture a calendar as your schedule keeper. Use online calendars or scheduling tools to plan your lessons in advance. It helps you avoid last-minute stress and keeps everything in order.
6) Personalize the lessons
One of our featured online ESL teaching tips is to personalize the lessons.
When you personalize the lesson, it has an impact. There are a few simple techniques you can implement in order to personalize your lessons:
- Address students by name. Using students’ names is important in class. If you forget someone’s name, don’t worry, especially in larger groups. But you should work on remembering names. It shows you care about your students. Overall, it’s an easy way to build a connection. When students hear their names, they pay more attention and feel respected. So, even if you forget names initially, try strategies to remember them. You can use name tags to make it easier. Over time, using names will become natural.
- Choose themes according to student interests/needs. This is connected to the student level and needs analysis we mentioned earlier. Once you have an idea about your students’ interests and needs, you can plan the lesson accordingly. However, planning each lesson for each student individually can be too much work. Try to recycle your lessons amongst various students. Oftentimes, you’ll find that a topic can interest students even if it’s not one of their personal interests. You can connect the topic to students by following the next tip:

- Ask questions about their opinions and experiences. Avoid talking and instructing too much. Focus on your students and tap into their opinions and experiences. Ask open-ended questions and connect the theme to students. For example, if your lesson theme is about artificial intelligence, you could ask students:
OPINION-BASED:
“Do you think our future will be better or worse with artificial intelligence? Why?”
EXPERIENCE-BASED:
“Have you ever used artificial intelligence? If so, how helpful was it? If not, do you think it could be helpful for something?”
7) Give reading lessons a try
Reading is a fundamental part of language learning. However, teachers often overlook reading skills. That’s why we’d like to focus on it as one of our online ESL teaching tips.

For online lessons, it makes sense to use online news articles, blogs, and short stories. The key here is to pick content that aligns with their interests and language level. You want to keep them engaged, but also make learning relevant. However, you can also consider physical reading sources too. Let’s help you make your online reading lessons engaging and effective.
- Use graded online resources. Share links to websites like Newsela, News in Levels, or Breaking News English. These platforms offer graded reading materials, which means your students can choose texts that match their reading skills. Plus, if you stumble upon a challenging article from BBC or CNN, you can use Chat GPT to simplify it, making it more accessible to your students.
- Check in with your students. Regularly check in with your students to discuss their progress and address vocabulary or comprehension challenges. It’s all about that one-on-one support and making sure they’re on the right track.
- Encourage students to read at home. Reading is a great activity to do at home. This can help students connect with English language outside of your virtual classroom. Assign books or articles that pique their interest, and make sure to include specific questions or topics for discussion in your next lesson. This not only motivates them to read but also keeps them accountable. Ask them what they like to read.
- Offer book recommendations. Based on students’ interests and proficiency level, you can help students find a book to read. This promotes independent reading habits and sets them up for success. It will also help them become more confident readers. And that’s a win-win!
For more ideas on what you can for reading activities in the classroom, check out Eric’s video here.
8) Learn how to manage discussions
Let’s dive into the art of managing discussions online. It’s a crucial part of language learning, and doing it online requires some thoughtful strategies. Here are some online ESL teaching tips to keep online discussions engaging and productive:
- Interact and engage. Start by exploring the interactive features your online platform offers. Using breakout rooms, polls, and other chat functions are great ways to engage students. Breakout rooms and polls are perfect for groups of 4 or more students. They allow students to have focused discussions and give input. There is also the chat function to serve as your digital whiteboard and notepad. And if you come to class with hot topics ready to cover. The more interesting the topics, the more your students will talk.
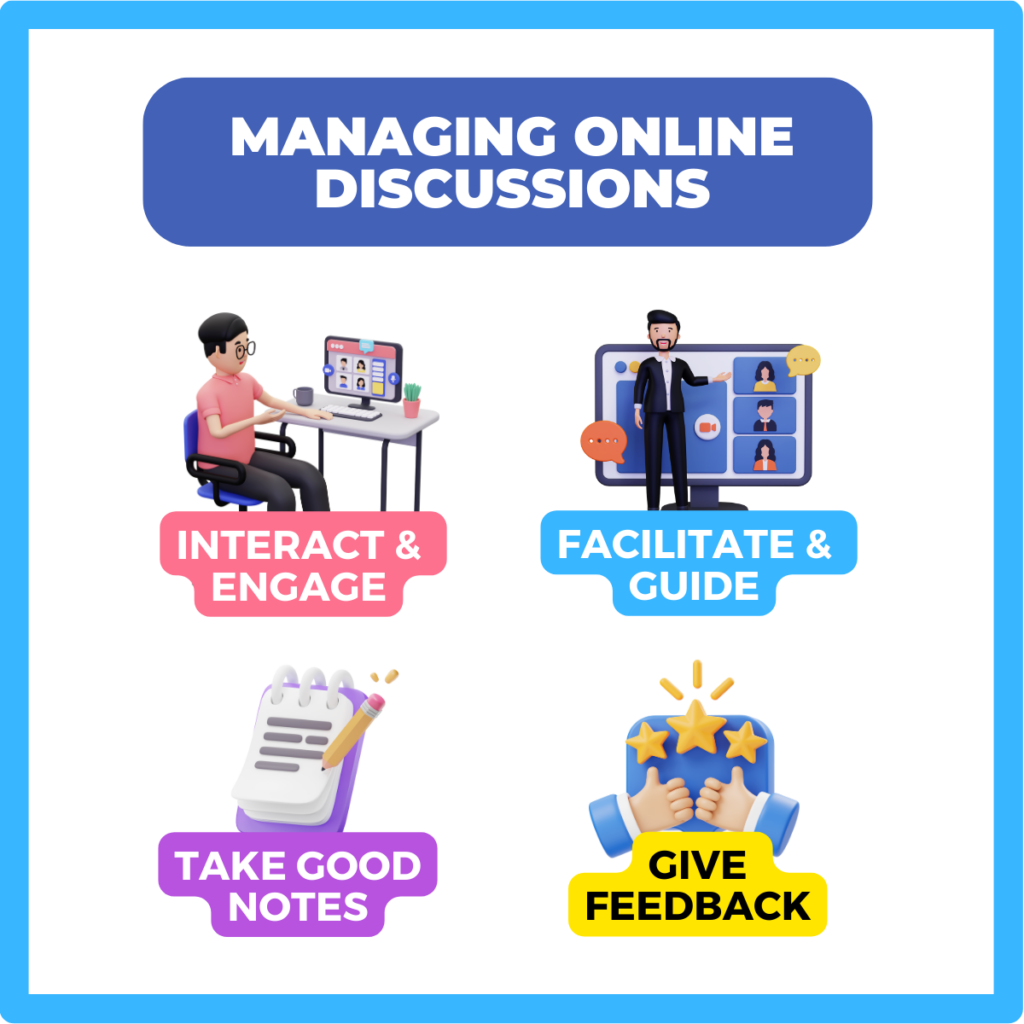
- Facilitate discussions. When preparing discussion questions, aim for ones that spark curiosity and invite diverse viewpoints. As mentioned earlier, you want to connect your lessons to students. Tap into their opinions and experiences. You want your students to think, discuss, and delve deeper into the topic. You can do this by asking plenty of follow-up questions to move conversations forward. To ask great follow-up questions you need to listen actively and prepare questions in your mind while students are still talking. This is a useful skill to develop over time.
- Guide discussions. In addition to asking and facilitating discussion, your role is to keep things running smoothly. Guide the conversation if it goes off track, and don’t be afraid to tell students you don’t understand something they say. You’ll likely run into situations where you’re just not sure what the student is trying to say. Ask students to clarify their ideas or say things in a different way if they struggle to articulate an idea.
- Take notes and give feedback. During discussions, you want to pay attention to student speaking errors, as well as how they present ideas. Listen to how they make their points or arguments. For example, if a student has a habit of rambling or getting off track, note that down. Also take note of the communication skills students could improve, such as active listening or effective argumentation. However, don’t only focus on what they need to improve. You should note down when students do something well, too! Giving feedback helps students know what to practice and keeps them motivated to learn. Also remember to give feedback both in the short-term and long-term. feedback. You can give short-term feedback at the end of a lesson. You can give long-term feedback every 3 – 6 months.
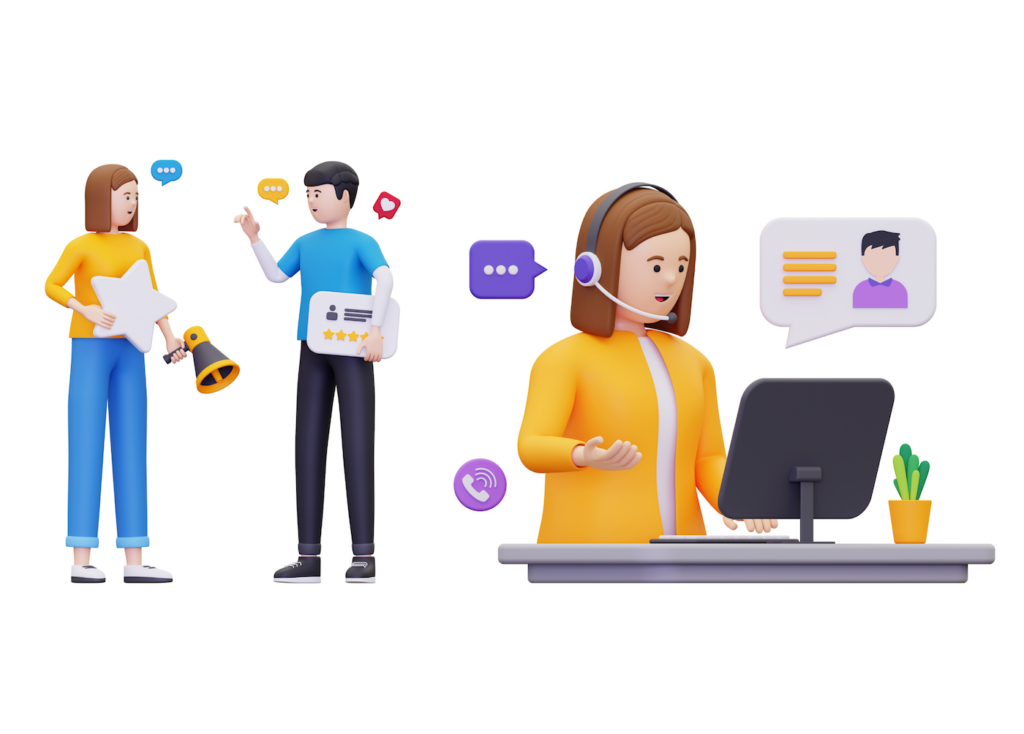
9) Giving feedback online
Feedback serves as a guidepost in the learning journey, just like how a GPS helps navigate a road trip. In online teaching, it’s very important. Let’s explore some strategies further.
Placement test
- Conduct a placement test or initial test. At the beginning of your online class, it’s useful to conduct a level test. It’s like figuring out where you begin on a map before you start your trip. You can use online platforms like Cambridge English or the British Council for this, which provide a CEFR level equivalent.
- Track progress. Periodically revisit the level test, say every 3 or 6 months, to assess your student’s progress.
Self-assessment
- Clear evaluation criteria. Provide students with rubrics or criteria for evaluating their writing tasks. You can give them a clear set of guidelines, like a checklist, that covers important aspects like grammar, vocabulary usage, and how well their ideas flow. This helps students understand what they should focus on and what makes a piece of writing good.
- Promote self-reflection. Encourage them to read what they’ve written and try to spot mistakes on their own. This isn’t about catching them doing something wrong; it’s about helping them become better at English. When they can identify their errors, they’re on the path to self-correction and learning from their own mistakes. This practice fosters independent learning and self-correction.
- Online forms for self-grading. Create Google Forms where students can assess their own assignments based on the provided instructions. These forms are handy because they not only capture their self-assessment scores but also provide a visual representation of their progress over time.
Tech tools for feedback on vocabulary
- Try out digital flashcards for vocabulary. Besides Anki, you can use other tools like Quizlet or Memrise. They help students remember words better. These platforms offer a user-friendly and interactive way for students to practice vocabulary. With Quizlet, for instance, students can create their own flashcard sets or use existing ones. The process of reviewing flashcards can also be gamified. Quizlet offers various study modes, including games and practice tests. You can turn vocabulary practice into an enjoyable activity. Memrise, on the other hand, emphasizes memory techniques and spaced repetition. This helps students remember words effectively.
- Keep a vocab journal: Tell your students to write down new words. They can use their phone’s notepad, WhatsApp, or Google Docs for this. By regularly reviewing and using the words from their vocabulary journal, students can gradually build stronger vocabulary. Additionally, this practice gives students control of their language learning. They actively curate their collection of words and phrases and tailor it to their interests and needs.
10) Find the right online tutoring platform
We can’t give you online ESL teaching tips without offering some platforms to find students.
If you’re just starting as a teacher, it can be stressful to find students. There are a lot of tutoring platforms these days to connect with learners. If you’re looking for a comprehensive overview of some of those, check out Kristen’s recommendations below. The platform you choose may depend on several factors. You should ask yourself:
- Do you want to teach children, teens or adults?
- Do you want to teach one-to-one lessons or groups?
- What is the platform’s reputation?
- What support and resources does the platform offer for teachers (e.g., training, materials)?
- What kind of commission does the platform charge per lesson, month, etc.?
- Are you comfortable with the platform’s interface and technology requirements?
Answering those questions can help you narrow down the right platform.
Our Featured Recommendation: Preply
Preply is an online language teaching and learning platform, connecting tutors to hundreds of thousands of learners in 180 countries worldwide. In Preply, students actively search for tutors based on their profiles. Tutors are encouraged to optimize their profiles to attract potential learners. They can do this by showcasing their expertise, personality, and teaching style. Here are some of more reasons why we recommend Preply:
- Access hundreds of thousands of learners worldwide. With highly motivated learners using Preply every day, you have access to the biggest pool of students.
- Manage your tutoring business effectively. Preply helps you attract more learners and earn a higher income through expert advice and new product features.

- Conduct your lessons with ease. Preply makes it easy for you to bring your lessons to life in our virtual teaching space, so you can focus on your students.
- Learn and improve with other tutors. You’ll never stop growing with access to Preply’s free professional development resources and global community of tutors.
- Teach with flexibility. Be your own boss, set your own price, and work from anywhere, anytime.
- Earn more by bringing your own students. Earn additional commission for each student you refer to Preply, and manage all of your lessons together in one place.
Preply also offers their own ‘Preply Classroom’ to conduct lessons. But you can also use other video calling platforms, like Zoom. However, Preply Classroom offers several advantages. Both tutors and students benefit from the seamless integration within the Preply platform. This eliminates the need to navigate to external tools. Additionally, the Preply Classroom has built-in features such as a virtual whiteboard, notes, and vocabulary tools.
As mentioned above, tutors on Preply have flexibility. They can set their own prices for lessons. Preply operates on a commission-based model, with a percentage deducted from each lesson. This commission decreases as tutors accumulate more teaching hours.
If you’re interested in trying out Preply, you can sign up here. The application process is easy and they process applications quickly.
Consider the 21-Day-Teacher Entrepreneur Challenge
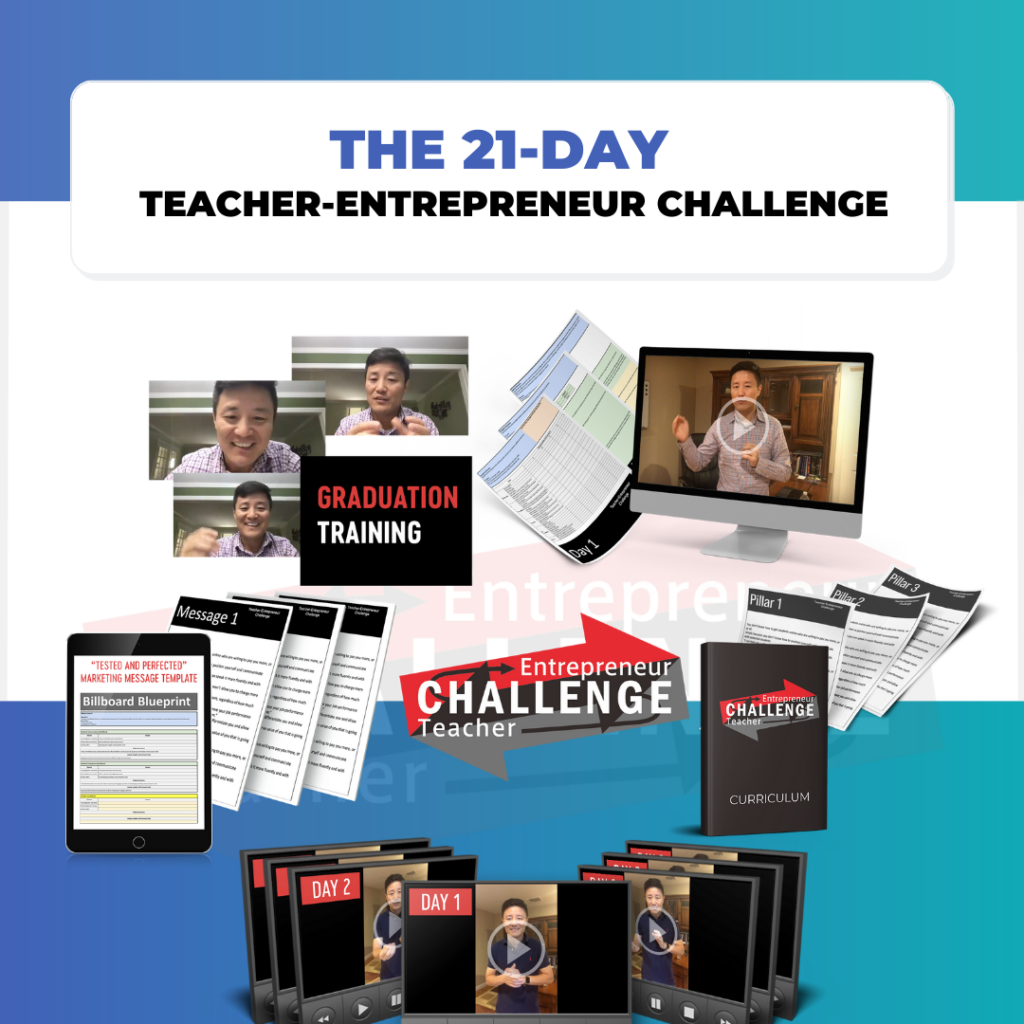
You might also want to consider going independent and building up your own private clientele of students. This enables you a lot of freedom, and you won’t have commission charges from platforms. However, as you may already know, it can be really hard to find students on your own and market yourself. If you’re interested in growing your own private tutoring business, but you’re struggling to market yourself as a teacher, check out the Boweis Strategy.
The Boweis Strategy offers the 21-Day Teacher-Entrepreneur Challenge. In 21 days, you’ll learn how to find students online, market yourself, and sell your teaching program at over $50 an hour by completing the following objectives and taking action to implement them, including:
• Define your niche to differentiate yourself from others
• Craft your curriculum and transition to program-based teaching
• Develop your marketing messages that actually resonate with your niche
• Market yourself to gather feedback and reach your actual potential
• Practice your entrepreneurial muscle and develop the mindset you need to get higher-paying students
There are a few options to take part. You can receive access to all the training materials and support at $97 for one month, $197 for 6 months, or $297 for lifetime access. If you can dedicate 1 hour a day to the Challenge, you should be able to complete the training within a month.
Another Option: Jooble

Jake from Fluentize also suggests that you check out some of these tips here on how to become a teacher from Jooble —an easy-to-use job search engine that helps you find job opportunities all in one place. It collects listings from various websites, job boards, and companies, making it simpler for you to search for jobs in your area or even remotely.
Jooble’s tips will give you a comprehensive breakdown of the qualifications, skills, and career paths available. You can also take advantage of some of their interview tips once you apply for a job that looks right for you.
Final Thoughts On Online ESL Teaching Tips
Teaching English online can be a blast! Remember to have a reliable internet connection, use good tech tools, and understand your students’ needs. Organize your resources, plan engaging lessons, manage your time well, and keep students involved. With these online ESL teaching tips, your classes will be a hit. And don’t forget, Fluentize is here to make your teaching journey even better! Do you have any of your own online ESL teaching tips? Feel free to leave them in the comments below. We’d love to hear your thoughts. Happy teaching, everyone!