Google Slide E-Lesson Tutorial
How To Use Fluentize's Google Slide E-Lessons
This guide will provide you tips for using Fluentize's Google Slide e-lesson format, especially on how to set the lesson up and conduct it in the most effective way.
USING THE LESSONS
Open the link for the Google Slide Lesson
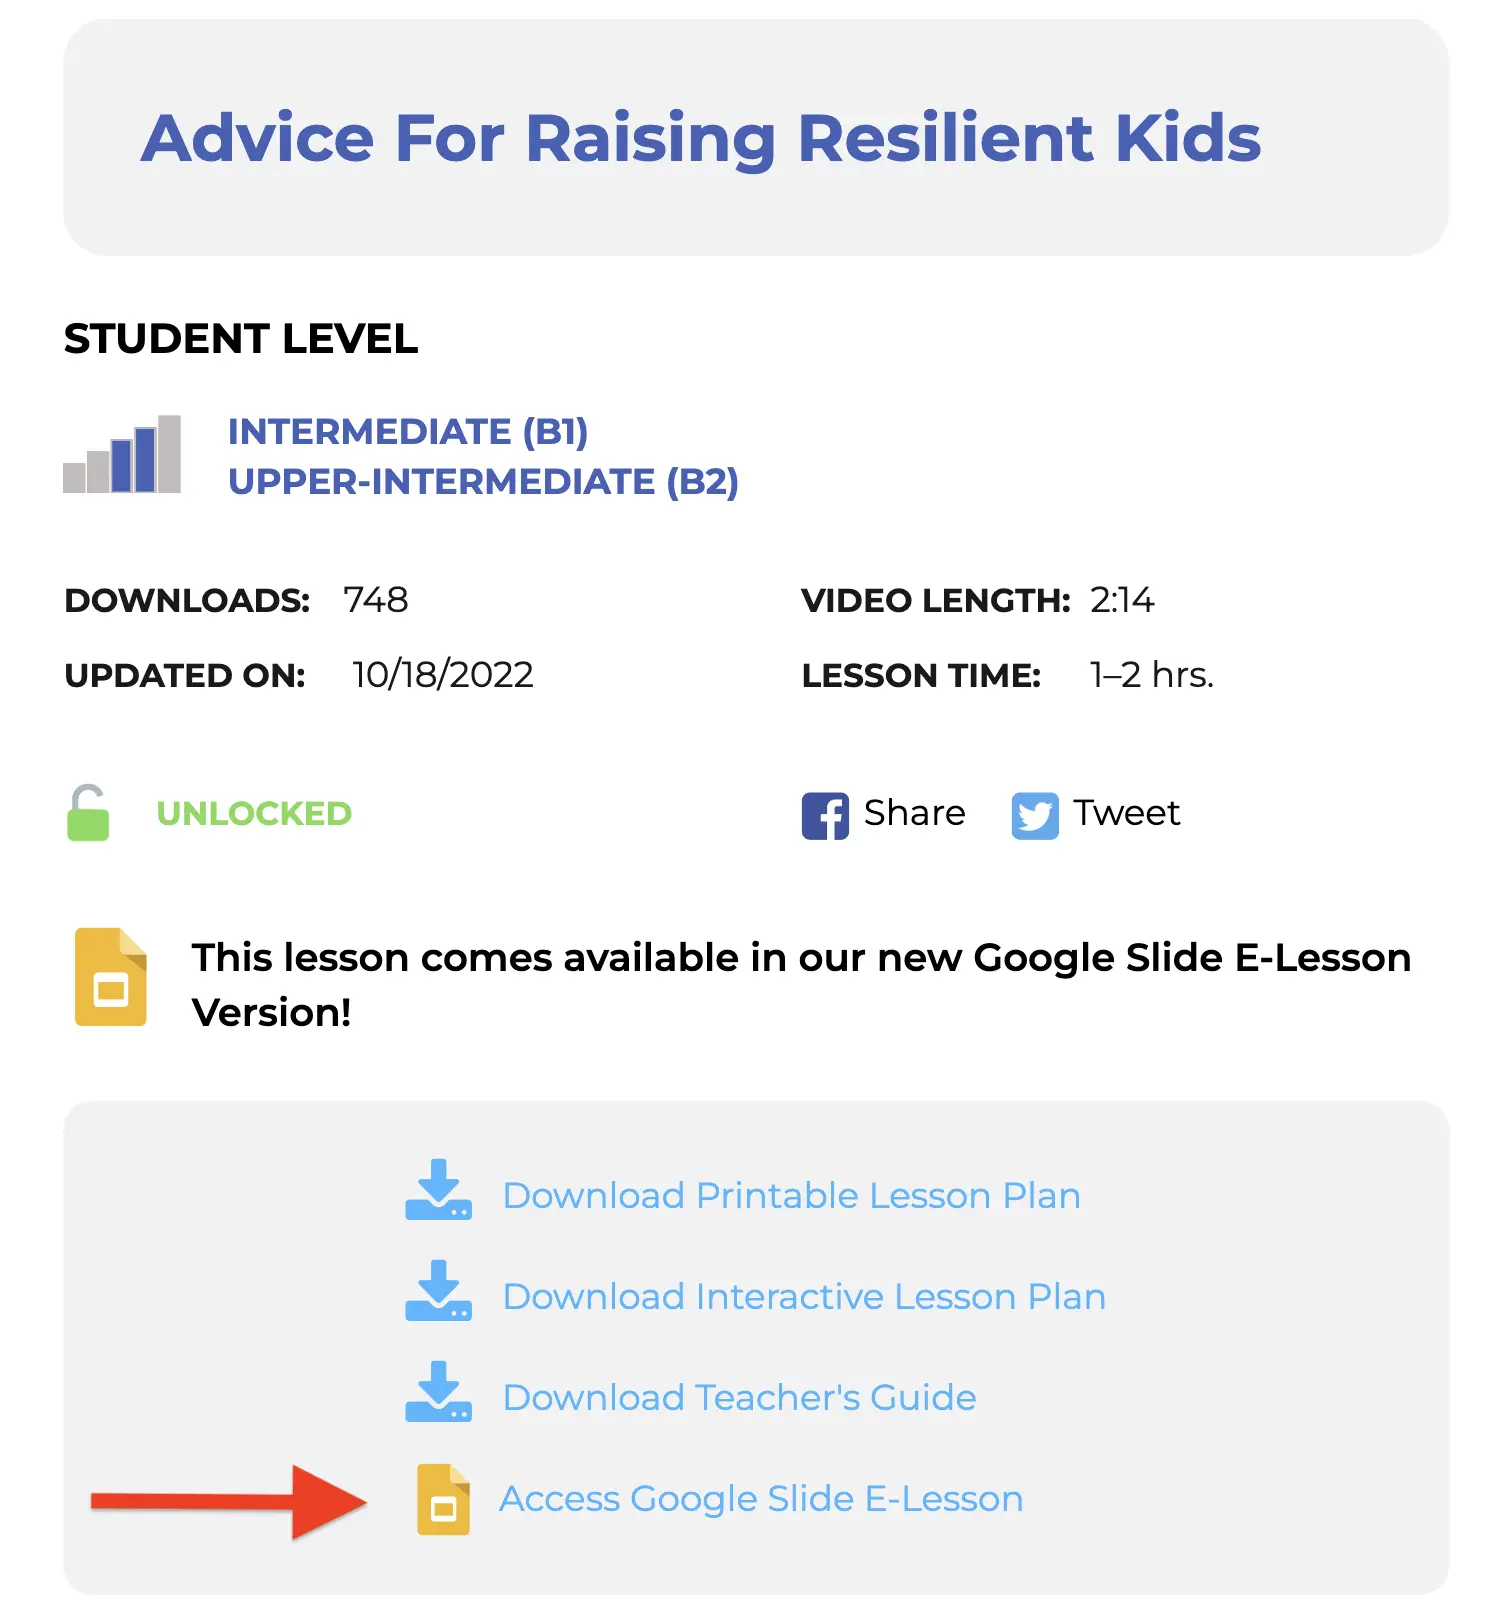
- Log in to your Fluentize account.
- Navigate to the lesson page you'd like.
- Unlock the lesson by clicking the button.
- Click on the Google Slide E-Lesson link.
- Download the Teacher Guide separately.
For our free lessons, you can unlock all the lesson materials, including the Google Slide E-Lesson after registering an account (also for free). For all other lessons, you should have credits or a full access account in order to access them.
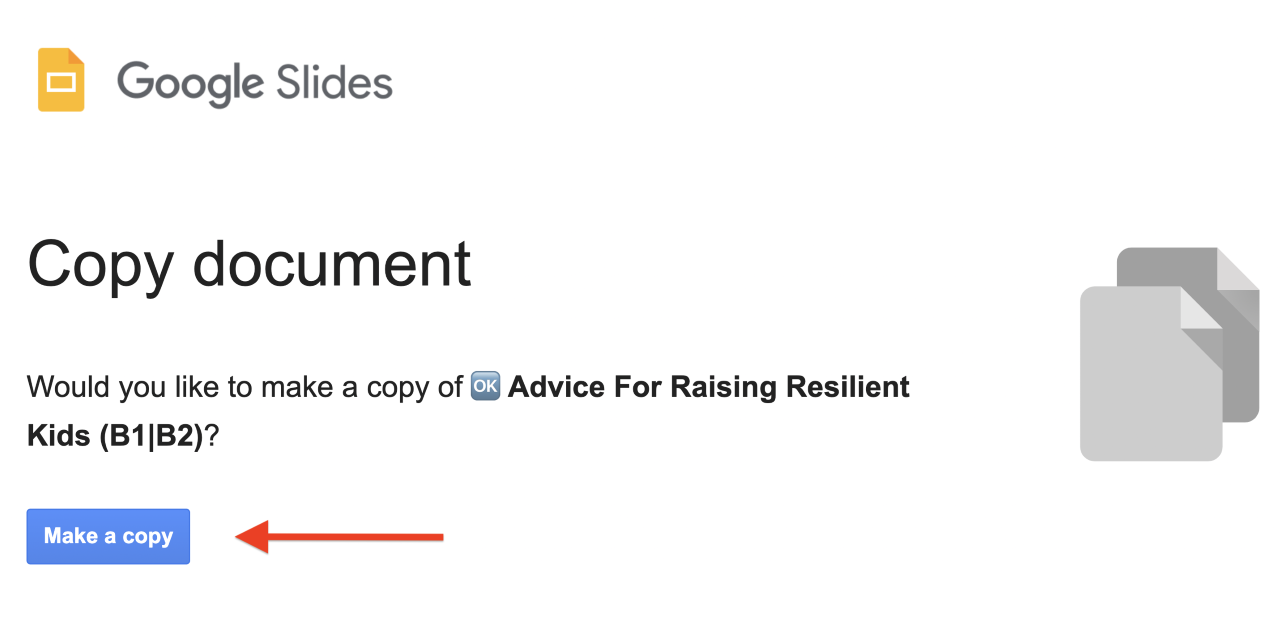
Whenever you open the link for a Google Slide E-Lesson, you will be requested to 'Make a copy'. Please click and confirm this in order to access the lesson.
Once you make a copy of the lesson, you can also easily share the lesson with your students by sending them the URL link, or by clicking the share button in the top right. However, sharing the lesson with students often isn't necessary until the end since you'll be the one controlling the screen (this is discussed a bit below).
Familiarize yourself with both 'Editor' & 'Slideshow' Mode
There are two ways in which you can conduct lessons using the Google Slides, either in editor mode or slideshow mode. It's great to get acquainted with both for teaching.
Whenever you click the link for a Google Slide E-Lesson and confirm making a copy, the lesson will open up in the default editor mode. You can see an example below:
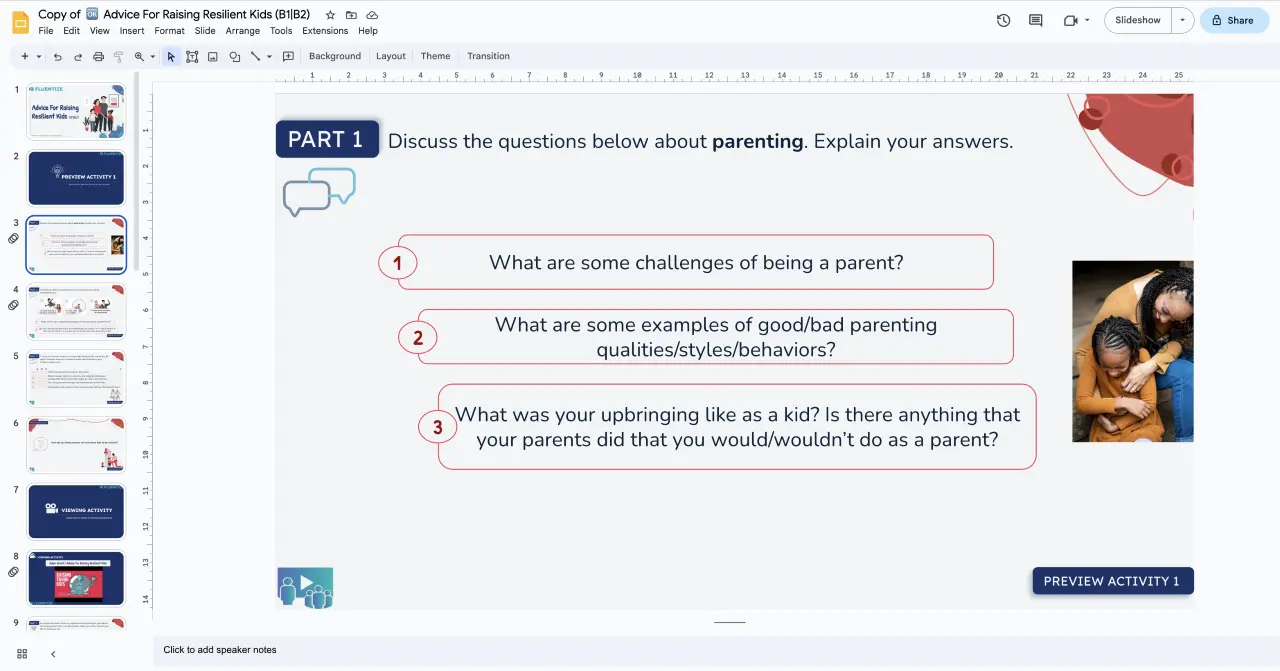
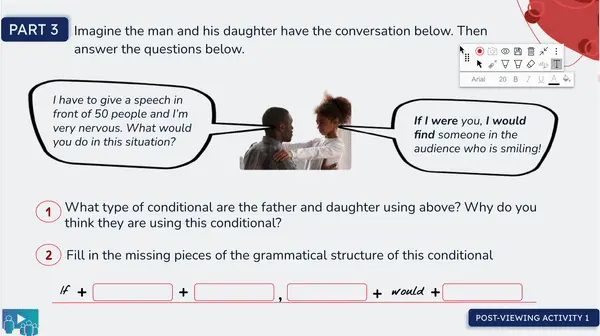
The advantage of editor mode is that you have the toolbar above the slides at your fingertips, allowing you to add or edit text, move content around, or make other changes. You should always use editor mode when students are prompted to type something or tick (✅) boxes, unless you have some kind of on-screen annotation tool/extension to use in slideshow mode (see below "Use an annotation tool in slideshow mode"). In editor mode, when you have the tick marks, you can simply drag and drop them to the boxes.
Please keep in mind that some of the activities are repeated — one slide for the student activity, and the following slide to show the answers. This is to help minimize your reference to the teacher guide and facilitate the flow of the lesson; however; some teachers may not want them. If you wish, you can always delete the answer slides by going through the lesson before conducting it.
In order to enter slideshow mode, you can see the button in the top right corner:
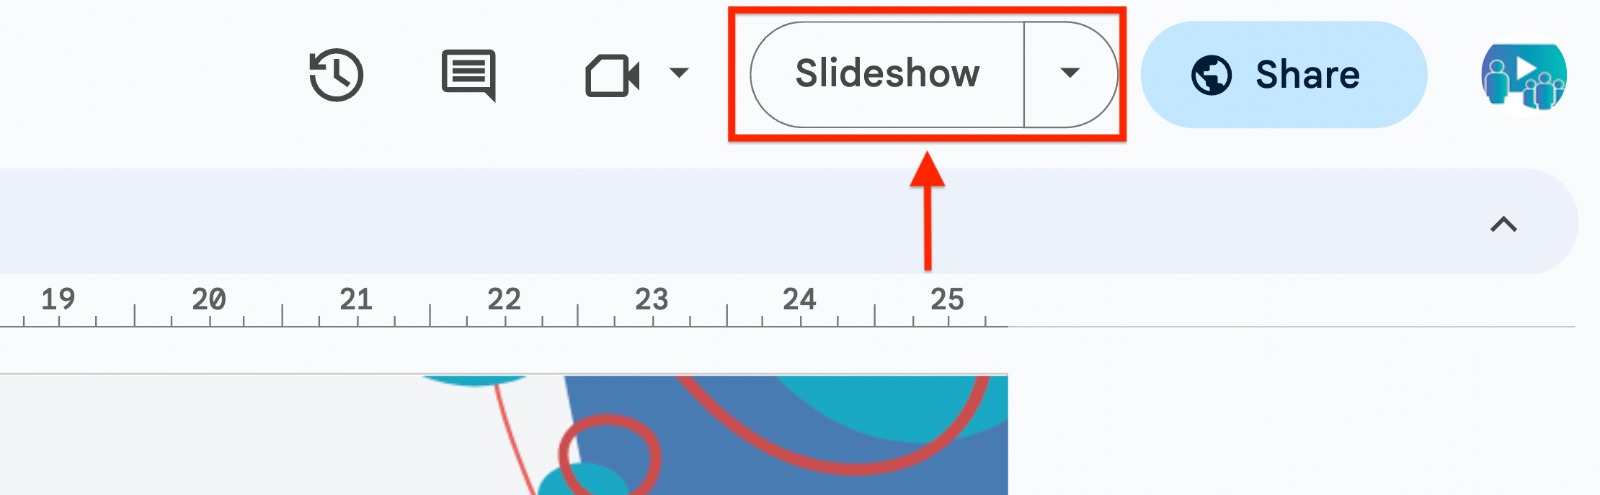
Slideshow mode is nice because it lays all of the content out in full screen, so everything looks a bit more cleanly presented than it does in editor mode. You can also very easily scroll through the slides with the arrow keys (up↑, down↓) on your keyboard. The main disadvantage of slideshow mode is that you're not able to edit the slides or move things around. You can really just navigate through the slides, unless you have an annotation tool available.
Use an annotation tool in slideshow mode
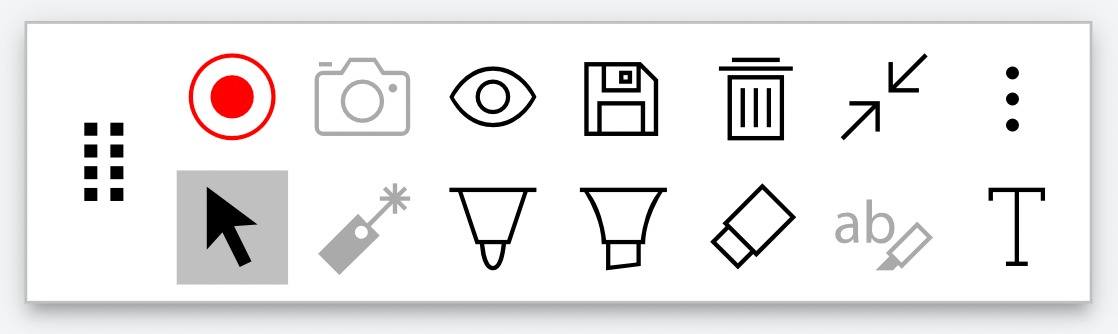
There are some tools you can download, such as this Google Chrome browser extension (Annotate.net) that allow you to add text directly to the screen, even in slideshow mode. Keep in mind that Zoom's annotation tool in the toolbar could also be an option. When sharing your screen, it's really useful to be able to add text or tick boxes in the parts of the lesson where this action is prompted. There are also some really handy guides available on the web that can teach you the basics of this kind of browser extension, although for the most part it's relatively intuitive. Some very useful features of an annotation tool do require a paid plan, such as the ability to change text size, but the basic free plan can still come in handy. You can see the annotate tool in the top right in the GIF below that allow you to do things like write text and tick boxes.
If you don't want to use an annotation tool, it's also possible to use a combination of both editor mode and slideshow mode, switching between them as needed. Many slides don't require typing by the students and so you can simply do them using slideshow mode. And remember, if a slide requires some typing, you can always easily just click the 'ESC' (escape) key on your keyboard and you'll automatically revert back to editor mode.
Control the screen and share with your student
If you already use the Fluentize Interactive PDF lessons, you likely already follow this tip. However, we'd like to recommend that for the Google slide lessons, make sure that you're the one controlling the screen in the lesson, not the student. The student might need quite a bit of practice to get used to the Google Slide lesson format, so that's why it's best if you open and control the lesson from your screen, and then share your screen with students, so that students can concentrate on the tasks at hand.
One nice thing about the Google slide lessons is that you can save the lesson, even with on-screen edits or typing that is added. That means you can write notes, new vocabulary, translations, etc. on the slides for students and then save and send them the lesson files for them to review. This also comes in handy if you want to assign them one of the lesson activities as homework.
Send the video link to students and pay attention to the speaker note's
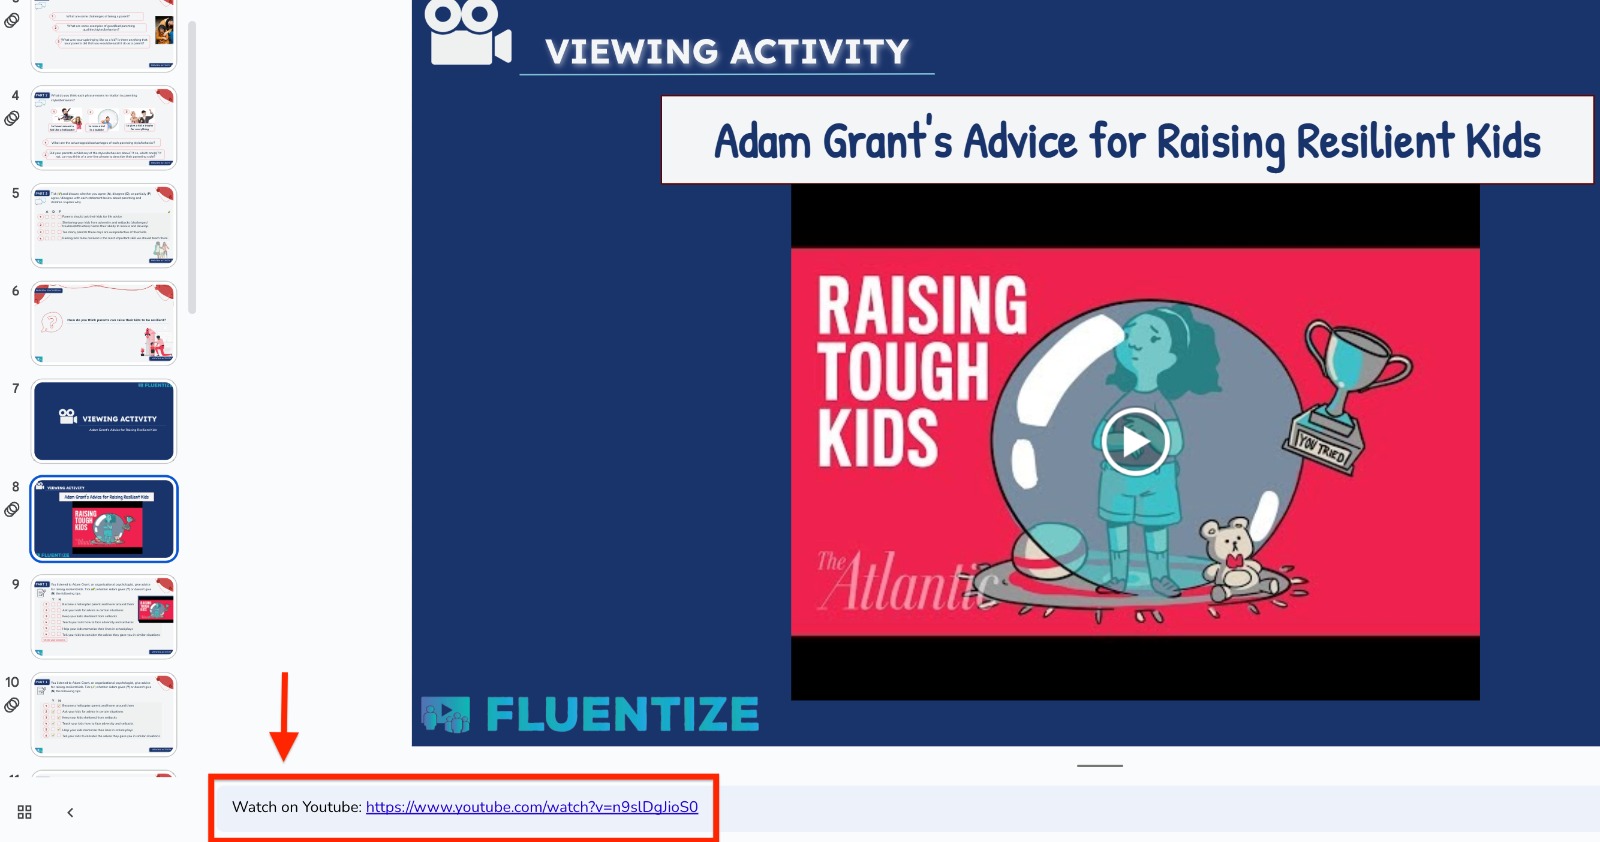
When it comes to the point in the lesson where students watch the featured video that the lesson is based on, it's best if you send them the YouTube URL link or the Fluentize lesson page link where the video is. This is because if the video is played from your screen in screen share, some sound quality might be lost and might make it difficult for students to understand it clearly. This is why it's often best to send the video to students to watch from their screens.
For every lesson, as you can see below, we provide the URL link in the speaker's notes, where you can easily copy, paste, and send the URL link as seen below. Pay attention to the speaker's notes as they do contain some other information that can help you specific to that lesson.
Review the lesson in detail before conducting it
Although this applies for the PDF lesson format as well, we recommend that before conducting any lesson, take some time to review the lesson plan in detail. Preparing for a pre-made lesson will make your lesson really shine! This is recommended in order to gain ideas on how you envision the lesson to play out, prepare for some of the answers to the activities, come up with your own ideas for the lesson, and get a little bit of a head start if you are conducting role plays or other kinds of interview tasks.
One of the advantages of the Google Slide lessons is the ability to do things like delete slides, edit the activities a bit, instructions, or other text. so that the lesson plan is easily adaptable according to your preference. Reviewing the lesson beforehand will give you the ability to implement any changes or edits you'd like to make.
Open the teacher guide in another device or print it if possible
Although this is another tip that also applies for the PDF lesson format, we'd like to suggest that you open the teacher guide in another device, or have it printed and displayed in front of you for the lesson. This is so that you don't find yourself switching back and forth between the lesson plan itself and the teacher guide on your screen during the lesson many times.
BENEFITS OF USING THE GOOGLE SLIDE E-LESSONS
Although we still advocate the use of the PDF lessons (they can be done online as well using the "Interactive PDF Lesson Plan"), we've identified below what we see as the main advantages of the Google Slide lessons:
- Flexibility
- Being able to do things like annotate or add text on the screen is a huge plus for these lessons. Although our Interactive PDF lessons have the interactive fields for students to type in, being able to add text anywhere on the screen is a practical feature to have. Then you can save the lesson (with the text you've added on screen) and send it to students so that they have it for reference.
- Editability
- In the Google Slide format, you can edit, adjust, or even delete the content according to your preferences and needs for your student. For example, if you don't want to do a certain activity with a student, you can simply delete the slide. Or maybe you'd like to adjust the instructions, part of the activity, or change one of the vocabulary words. Using the Google Slide format gives you the ability to do this.
- Flow & Design
- The activities and the lesson structure of our Google slide lessons is exactly the same as the PDF version of the lesson; however, with the slide lessons, you'll get a different flow and way of conducting a lesson. Instead of having a full lesson plan PDF page for students to view, they get one slide at a time, making the lesson flow a little bit smoother and making it more easily digestible for the students. The lessons are also designed a bit differently, thanks to the brilliant efforts of our Google Slide content designer, Dea!
- Familiarize yourself with both editor and slideshow mode
- Use an annotation tool in slideshow mode
- Send students the video links for the lessons
- Review any lesson you do in detail before conducting it
- Open the teacher guide in another device or print it if possible
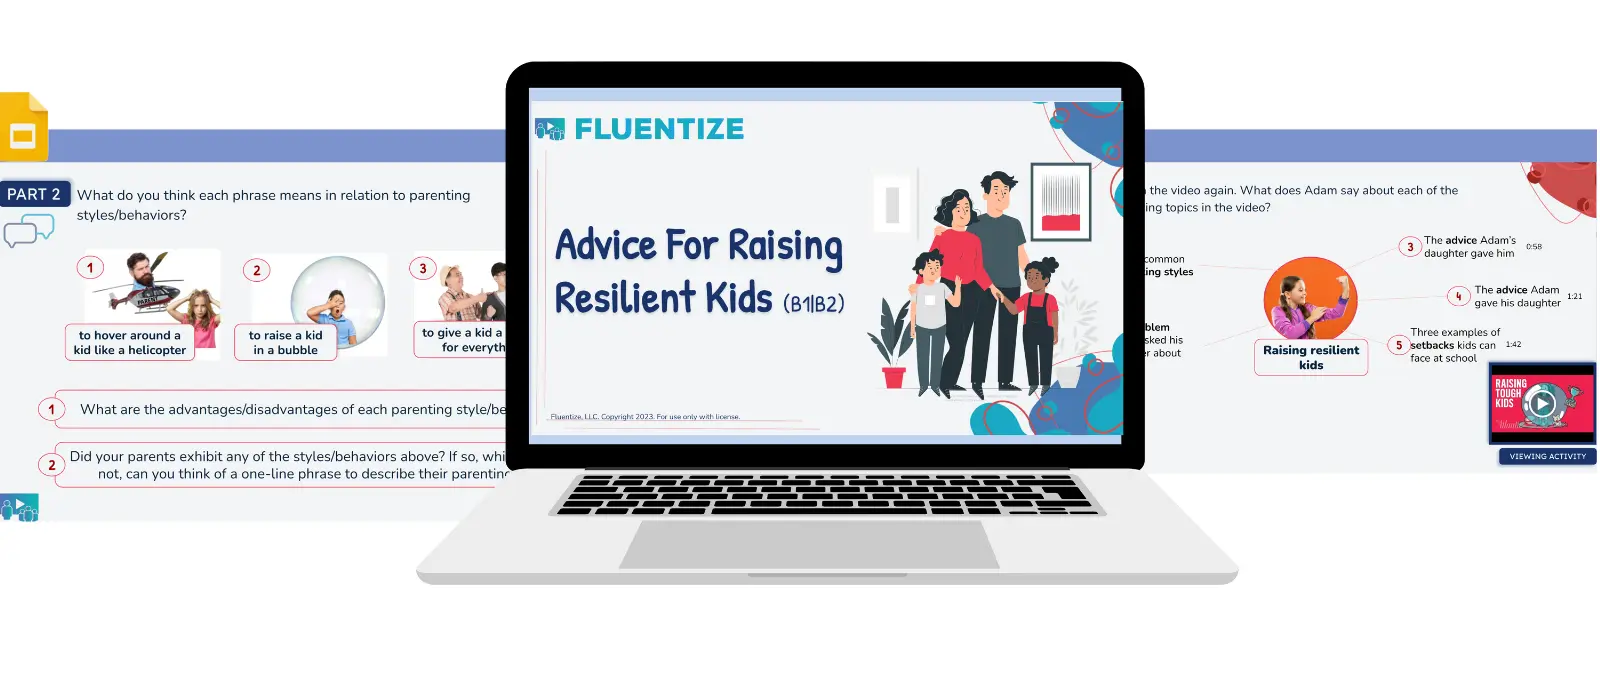
GOOGLE SLIDE DEMO E-LESSON
The demo video below is a condensed 20-minute Google Slide demo lesson in action, featuring an upper intermediate student, Cristiano, and Fluentize's founder, Jake. We compacted the full lesson into a shorter version, just so that you can see the basics of a Google Slide lesson and the annotation tool in use. The lesson demonstrated is titled Advice For Raising Resilient Kids (B2).
We wish you the best with the Google Slide e-lesson format for your online lessons! If you have any questions or need any help with them, please don't hesitate to reach out to us and request assistance.