In this post for ESL teachers, we’ll discover why using videos in ESL lessons can help your students succeed. We’ll also share some useful ideas for using video as a resource.
To start, let’s talk about YouTube.
Have you ever gone on YouTube, clicked on a video, and fell down a rabbit hole of more videos? I know I have.
YouTube’s success shows how much people love video content. YouTube has 2.6 billion active users, and people watch over 1 billion hours of videos daily.
When it comes to education, video use has been especially impactful. 58% of people use digital content to learn new skills. Although the pandemic helped eLearning grow, its rise was inevitable. People like the flexibility and convenience of eLearning.
Using videos as a teaching resource has become a part of online education. In this post, let’s explore how this is especially true in the ESL classroom.
What makes video a valuable resource in ESL lessons?
Before sharing ideas on how to use videos in ESL lessons, let’s examine some reasons for using video as a teaching resource.
YouTube’s Treasure Chest of Content
YouTube has over 800 million videos and 37 million channels. With so many video available, you’re going to find something useful for your ESL classes.
This wide availability of videos makes it easy to find topics for students with varying interests or needs.
However, it’s important to choose ones that are suitable for the ESL classroom. Mainly, videos that are both engaging and level appropriate. This is the sweet spot for learners.
In your ESL lessons, there are many types of videos that can engage and educate students, including:
News reports
Comedy skits
TV series clips
Travel guides
Tutorials
Interviews
Documentaries
Cinematic stories
Music videos
Product reviews
TV Commercials
And the list goes on.
The suitability of a video often depends on a student’s language level. For example, TV commercials often make a great choice for lower-level students. This is due to the average length of most commercial videos. Since many commercials are only 30 – 60 seconds long, they don’t overwhelm viewers with too much information.
Secondly, commercials are made to sell things. They grab your attention using dynamic pictures, sounds, animation, or words. Some are even meant to be fun or funny. This makes commercials a great choice for lower-level ESL students.
On the other hand, there are many videos that are better suited for high-level students. For example, videos from TED-Ed. TED-Ed videos are generally too hard to use with low-level students. Although the videos are engaging, they often contain very complex vocabulary and narration. This makes them too hard for a lower-level student.
For these reasons, you should consider the difficulty of a video before deciding to use one in your lessons. One common mistake many new teachers make is using videos that are either too hard or too easy. Although it can be challenging to assess the language level of a video, it’s important consider when choosing videos for your ESL lessons.
Overall, you have endless videos on YouTube to use in your ESL lessons. You can pick a commercial, a TED-Ed video, or ones with native or non-native speakers. This means you can find videos on topics your students like, need, and understand in English.
The Power of Visual Learning in ESL
For various reasons, our attention spans have shrunk in recent times. This has made it harder to keep people engaged with text. Videos, on the other hand, can be more effective.
This is because videos use design and interactive elements to capture viewers. They offer a combination of visuals, sound, and animations to explain information in various ways. This helps us process and remember what we’ve seen and heard.
However, not all videos are engaging. Even if a video aligns with your students’ level, it might not be effective. If a video is dull and lacks appealing visuals, it probably won’t work well. A video of a person standing and talking in front of camera often isn’t as engaging as one that uses visual elements.
While you don’t need Hollywood-style effects, it’s important to choose videos with dynamic and compelling visuals.
On the other hand, a video might look great but could be unsuitable for lessons. This is especially true if it has profanity, unclear speech, complicated language, or is too long.
To engage your students with videos in ESL lessons, consider these tips:
Choose a video that matches your student’s level.
Look for high-quality visuals and animations.
Ensure the video has clear audio and dialogue.
Use videos from reputable sources.
Avoid videos with profanity or complex language.
Keep the video length between 1 to 5 minutes, depending on the student’s level. Lower-level learners may benefit from shorter videos. Remember that an advanced learner can handle longer videos better than a beginner.
All of these tips should help engage your students. Consider them to make videos in ESL lessons impactful.
Connect ESL Learners To Authentic Dialogue
Using authentic videos in ESL lessons can make a strong impact. Authentic videos are ones not made for teaching or learning English. They expose learners to natural language, different accents, and useful phrases. This is important because if you teach American English, your students might miss out on other types of English, like British or Australian. Watching videos with speakers from these countries can enrich their experience.
However, don’t forget about videos with non-native speakers. They can be helpful too, depending on the video, topic, and how well they speak English in it.
It’s also important to consider using ESL-specific videos in lessons. These are videos that are made for ESL learning. ESL-specific videos are valuable for learners who need graded language. Creators of ESL-specific videos often speak simply and slowly for their English-learning audience. They may avoid complex language, phrases, and jargon.
In the end, both types of videos can be valuable, whether they’re authentic or ESL-specific. However, authentic videos offer real-world language that ESL-specific ones usually don’t have. Since authentic video creators don’t consider ESL students, the language is truly natural. Natural language is what students need outside the classroom, while graded language is more of an aid in the learning process.
A Flexible ESL Teaching Tool
YouTube has a variety of helpful features to facilitate learning. These allow teachers to use videos ESL lessons in ways that either aid or challenge students. This is why it’s a flexible teaching tool.
For example, let’s say you have an intermediate student who works in IT. Imagine the student is interested in robotics. You come across a video and lesson plan based on robotics. The video, though, is more suitable for an advanced student.
On YouTube, you can adjust the video speed. This may help your intermediate student understand the video better. Slowing down a video is an effective way to make a tough video easier. Even though it may sound a bit different when slowed down, it still can work well.
Furthermore, you can interact with video in other ways. You can pause a video at certain points, replay it multiple times, enable captions, and refer to a video transcript. You can take advantage of all these features to help your students.
For example, you can use subtitles to help students understand a hard video. If you want to challenge a student, you can keep or turn subtitles off.
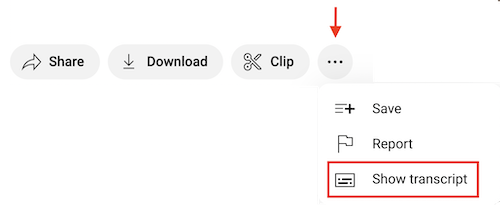
Video transcripts are very helpful too. Remember — video transcripts, even auto-generated ones, can be accessed through the video settings:
Navigate to any YouTube video.
Click on the three dots on the right below the video.
Click ‘Open transcript’. The transcript will appear to the right of the video.
For the auto-generated transcripts, you may have to reformat them. This means rewriting them, fixing the grammar and spelling, and correcting punctuation. Nonetheless, video transcripts allow you to refer to the written narration or dialogue. This can help students understand the video better.
All of these YouTube features enhance learning and make it more accessible.
Language Comes To Life In Videos
Learning is more effective when it’s bite-sized. Learners retain more information if they aren’t overwhelmed. “Microlearning” is a method based on this idea.
Essentially, it focuses on breaking lessons into short versions. For example, instead of 60-minute classes, you can do three 20-minute or two 30-minute lessons.
Also, keep in mind that three minutes of speech in a video is a lot. While three minutes may sound like a “short” video, there can still be a lot of information to process. Microlearning focuses on one part or a few quotes from that 3-minute video. Then, you can create activities based on that part or those quotes.
Video-based learning makes microlearning possible. It can combine text, animation, and design to build context. This helps learners retain vocabulary. When there is a strong context, there is often useful and relevant language.
Naturally, videos offer a rich language experience. For example, in this lesson plan based on a scene from the TV series ‘Friends’, Joey tells his friends about a dating experience he had. The characters use a lot of vocabulary in their conversations that are thematically relevant to the topic of dating, such as:
to share food(with someone)
to get along (with someone)
to set someone up (with a friend)
to go out (with someone)
to stare (at someone)
These are useful and practical dating-related vocabulary terms, all contained in one video.
In the video, there is also a lot of opportunity for grammar. The characters use the past simple and past continuous in their dialogue:
JOEY: “We were out to dinner. We were getting along, having a really nice time, I was thinking she was really cool and then, out of nowhere, [shereached over and took some of my fries from my plate!]”
PHOEBE: “So shetook some fries, big deal!”
RACHEL: “Oh yeah, Joey doesn’t share food. I mean, just last week, we were having breakfast, and…and he had a couple of grapes on his plate…”
This is just a small part of their dialogue, but it contains multiple examples of one grammar point. That makes it great target language for the lesson objective.
If you want vocabulary as your objective, we suggest choosing just 7 – 10 terms. This is just a rule of thumb to follow. For this specific video, you could use some of the dating phrases given above.
Although a video might have 20 unknown vocabulary terms, you want to focus on a handful. Try to create connection and context between them. If you try to teach 20+ words, it may overwhelm students. This is especially true if they’re out of context. As mentioned earlier, context helps students retain the target language.
Try to create multiple activities for the same vocabulary terms. This is more effective than trying to cover multiple skills. Small chunks, repetition, and language in context are key ingredients for successful activities.
Remember to use just a few sentences from the video to base the target language on. Videos can give learners a lot of rich language in a short time period. Give it to them in bite-sized chunks to get the best results.
Techniques, Activities, & Resources For Videos In ESL Lessons
Now we know the reasons why videos in ESL lessons are an effective resource. Now, let’s offer some tips on how to incorporate them, including effective methods, activity ideas, and materials to use. Mainly, we’ll go through the basics of lesson planning for videos in ESL lessons.
Preview & Prediction-Based Tasks
Before watching videos in ESL lessons, it’s important to do preview activities. These include conversational activities on the topic or vocabulary terms to prepare students for the video.
These activities give students a chance to express opinions and discuss what they already know. They’re great ways to check students’ understanding and introduce video vocabulary.
Another effective way to create context before watching a video is through prediction-based exercises. Images or photos work well for predictions. Choose images that represent events in a story, objects in the video, or other ideas that might be referred to. This helps students make connections to the video theme.
Don’t feel limited to just images for prediction tasks. You can also use text or take video quotes and be creative.
For example, in the ‘Friends’ lesson, students analyze part of a quote they’ll hear in the video:
In the video, Joey starts his story with the same quote. Then, the video shows what happens — a girl reaches over and takes some of his French fries. Therefore, this type of exercise creates context and lets students use some language from the video.
You can even create prediction tasks during the viewing of the video. For example, in certain videos that are story-based, you can pause the video at certain points as you watch it with your student. Then, prompt them to predict what will happen next. Make sure you have the right time points to pause at for students to make a prediction.
If you do that, be sure to check students’ predictions afterward. You can do this by simply asking them, “How similar was your prediction to the actual video events?”
Predictions keep students on their toes. It requires imaginative thinking and elicits new vocabulary. It’s also a great way to make learning more active and fun.
Post-Viewing Exercises
Simply put, post-viewing exercises are made for students to do after watching a video. They are based on the video topic, content, and/or dialogue. There are many directions you can take these.
One example one we’ll show here is based on shadow reading. Shadow reading is when students practice pronunciation through simultaneous readings. It often requires playing a video with the narrator reading a specific passage. You provide students with the same text, and they read along out loud.
This exercise helps them understand the difference between their pronunciation and the correct pronunciation. Many videos are specifically focused on shadow reading, so student can practice privately too.
However, you could also use lesson plans with activities for variations of shadow reading. For example, let’s refer back to Fluentize’s free ESL lesson plan based on the scene from the TV series Friends.
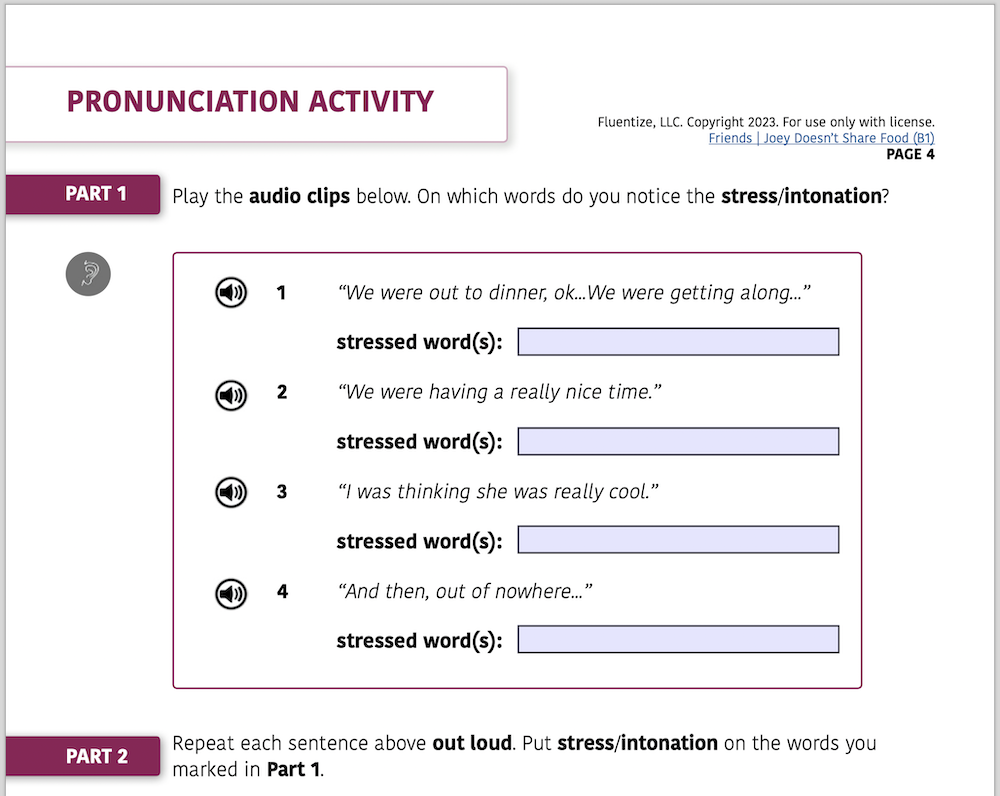
As we examined earlier, Joey and his friends use the past simple and past continuous tenses in their conversations.
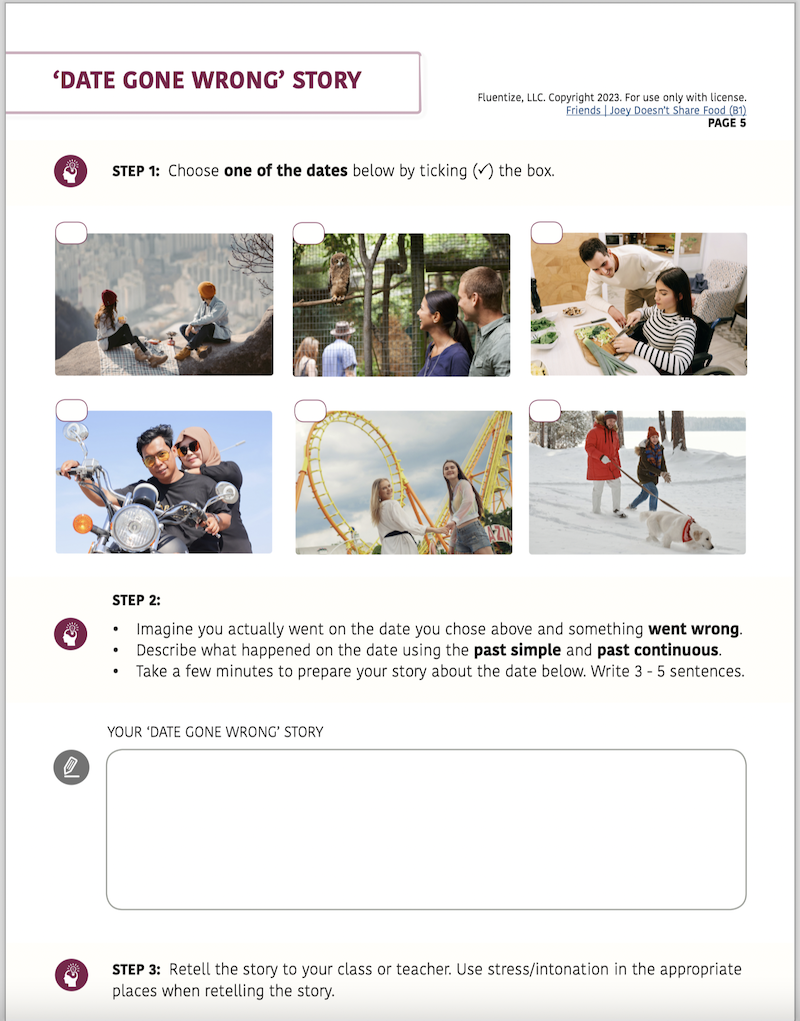
If you refer to the fourth page of the lesson, it’s turned into an activity with a variation of shadow reading. Students listen to an audio clip of a different speaker telling the same story. In the activity, students detect where the pronunciation stress and intonation is in the audio clip. Then, they repeat the lines using the same stress and intonation.
After learning about the pronunciation rule, they get to tell another short story out loud using this same rule.
This is just one way to take advantage of the shadow reading technique. As you’ll find, it can really help students train proper pronunciation in a variety of scenarios.
Communicative Activities For Videos In ESL Lessons
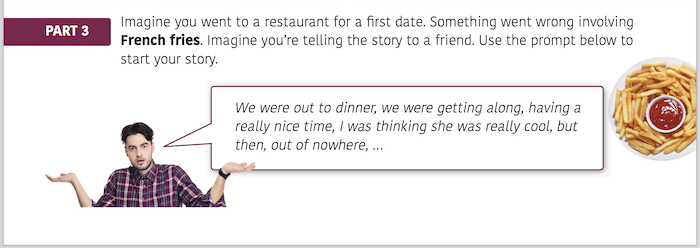
One of the most effective ways to have an impact on students is through communicative activities. These are activities that help students learn the target language. These activities put students in real-life scenarios. You can create these through role plays, interviews, story-telling, making plans, presenting, researching, among many others.
Let’s refer back to the same Friends lesson plan. The past simple/continuous and shadow reading exercises turn into a communicative activity. Students come up with their own story of a date gone wrong, and describe what happened. In it, they use the same kind of stress and intonation patterns as Joey in the scene. The objective is to tell a story using the past simple or past continuous while practicing pronunciation at the same time.
This part of the lesson we call the activation or production phase. It’s where students produce the target language in a real-life context. Having students tell a story using the past simple and continuous can help them prepare for this scenario outside the classroom. This allows students to take the language that they learned earlier in the lesson and use it in a practical context.
Lesson Materials Based On Videos In ESL Lessons
When you use a well-prepared lesson plan with an engaging video, your student gets the best of both worlds:
Learning aids through the lesson materials
An authentic resource through the video
If you play a video for your student without any lesson plan or materials, you may find it hard to navigate.
It’s like trying to cook a meal for your first time without any recipe. Sure, your meal might be great, especially if you’re an experienced chef. But if you follow a trusted recipe, you’re more likely to cook a fantastic meal.
The same goes for ESL lessons. Many teachers often just watch a video with students, but improvise without materials. Without the materials, your lesson can still be effective. You could do prediction-based tasks, analyze sentences, or discuss vocabulary.
However, you may find that this approach doesn’t give students the full experience.
On the other side, if you just do a worksheet activity on its own that isn’t based on anything, students miss out on factors, like engagement. Depending on the quality, worksheets can engage students. However, when they’re based on a video, this is the icing on the cake. It allows you to have a stronger impact.
One con of this approach is that lesson planning and video searching is time-consuming. It also also takes a great amount of skill to create high-quality video-based ESL lessons. While many teachers are able to write great materials, this isn’t always the case. Teachers often lack the time to write materials during a busy schedule.
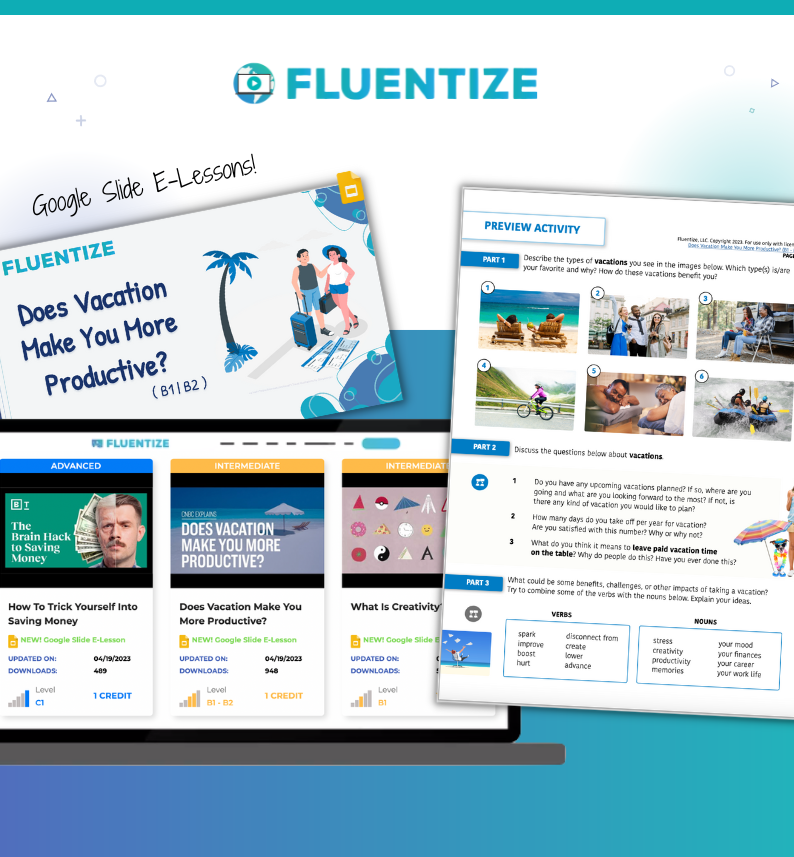
Luckily, platforms like Fluentize have a library of 450+ ESL lesson plans all based on videos. They’re all designed for ESL language teachers and online tutors who teach teen or adult students. Videos are our main ingredient for all of the lesson materials we create. We do the hard video searching and lesson planning work for you.
At Fluentize, our mission is to make your job easy by bringing you well-structured and creative lesson plans that have an impact. Each lesson comes with preview activities, discussion, and listening comprehension. Then, there are more discussion, vocabulary, grammar, or pronunciation activities to do after watching a video. They also come with communicative tasks, quiz and reviews, and a teacher’s guide at the end.
The lessons also come in multiple lesson formats such as printable, interactive PDF, and Google Slide E-Lessons to supplement each video.
If you want to make an impact using videos in ESL lessons, make sure to check out Fluentize.
Final Thoughts On Videos In ESL Lessons
We hope the ideas we’ve shared about videos in ESL lessons video-based content is optimal for knowledge retention in your ESL lessons. You can use animated and interactive videos, rhymes, and shadow reading when designing lessons on Fluentize to achieve the desired results.
Don’t hesitate to contact us for more clarity about our products and services. We love hearing from our clients and will respond as soon as possible.
Your blog on mastering videos in ESL lessons is incredibly insightful! The strategies and tips provided are practical and highly effective. Thank you for sharing such valuable content!


3 thoughts on “Mastering Videos in ESL Lessons: A Key To Teaching Success”
Wow, that’s what I was searching for, what a data! present here at this blog, thanks admin of this website.
Your blog on mastering videos in ESL lessons is incredibly insightful! The strategies and tips provided are practical and highly effective. Thank you for sharing such valuable content!
Your blog offers invaluable insights and practical tips. It’s a must-read for educators seeking to enhance their teaching strategies. Well done!